Making these macrame Christmas trees is so fun.
Firstly though, I have to say I was asked a lot last year to make a video of how I make these macrame Christmas trees.
I have never made one exactly the same though. Like with most crafts I make I like to wing it and make it up as I go along. I know, I know not the best for teaching others.
I also struggle following other macrame patterns. I tend to change it up as I go along.
Anyone else like this?
I figured there has to be others. So I have filmed myself making 2, and yes they are both different.
This isn’t your normal step by step tutorial. More me talking you through my thought process and showing the different knots and techniques I used to create the finished tree.
Tools needed to make a macrame Christmas tree
- Macrame Cord: A single cord around 4mm works best but I have used 3mm single and 3/4mm 3 ply. I also like to mix up the textures for the short added cords so you can use any yarn or even fabric you like.
- A hoop: I used a wooden hoop with this one but I also used metal ones as well. Depends on your taste.
- Wooden Beads: These are nice to decorate the top but if you don’t have them you can make berry knots, I do a group of three. One on top and two below.
- Scissors: You will need a sharp pair for cleaner lines then cutting the tassels.
- Glue: Clear strong glue if you need to cut or tidy up any pieces.
I got everything from Amazon and you can head to the full list now.

Lengths of macrame used
These are rough amounts and you can swap and change it depending on the length and look you want to create. I always over cut and way I have so many scraps that I actually use to make these trees.
- 5 – 240cm
- 12 – 15cm
- 5 – 120cm
- 2 – 180cm
- 13 – 18cm
- 2 – 120cm
- 9 or 5 – 180cm
- 4 – thin 300cm
Knots used
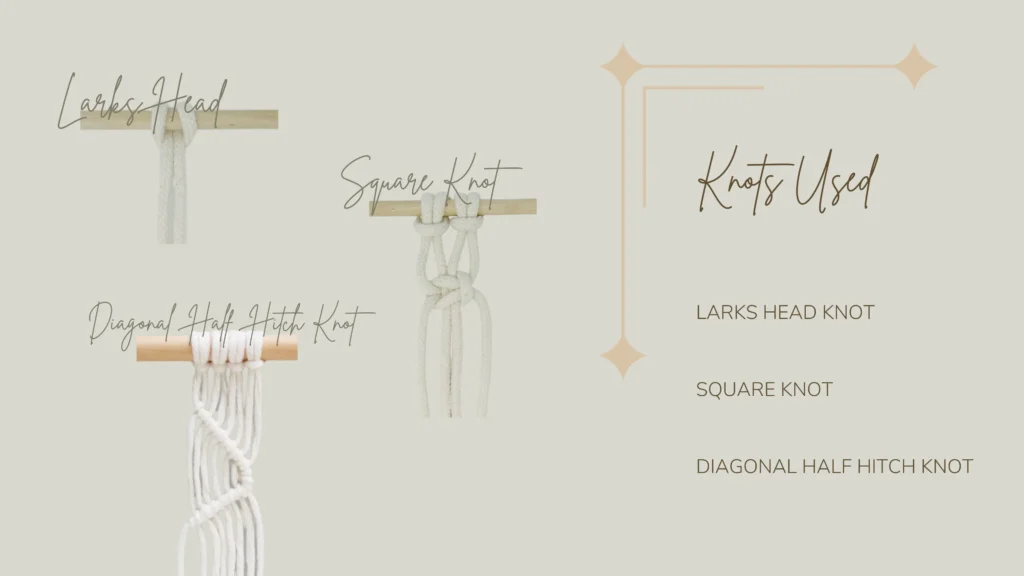
These are the knots I use in the video, I would say this video is more intermediate as you will want to use your own intuition as you make the macrame Christmas tree.
If you know how to do these notes then you will easily be able to create a tree the same or similar yourself.
- Larks Head Knot
- Diagonal Half Hitch Knot
- Square Knot
How to make a macrame Christmas tree
Cut your macrame cord.
The measurements above are for the smaller white tree. I used the same measurements for the larger tree I used more. You can make any size you wish by playing with the amount of rows you do for each layer.
Decide on your setup.
If you prefer to work on hanging macrame pieces then set up a station to hang your wooden hoop from. Here I have a peg board, this is easier for filming but I actually prefer a hanging station. You will probably be able to tell it just doesn’t feel as natural doing it this way.
Hang or pin your wood or metal hoop ready to start knotting.
Add Beads
Depending on the size you can add one or two beads. You could also add more if you wish. If you have no beads and you know how you can make berry knots also. I usually do a set of three, one on top and two below.
If your bead hole is wide enough you can thread two cords through. Mine were too small so I threaded one through which made it slightly off.
You then add two more cords with a larks head knot.
Then using a half hitch knot you create a circle around the bead. If using two beads you repeat again.
If only using one bead you do two diagonal half hitch knot lines only.

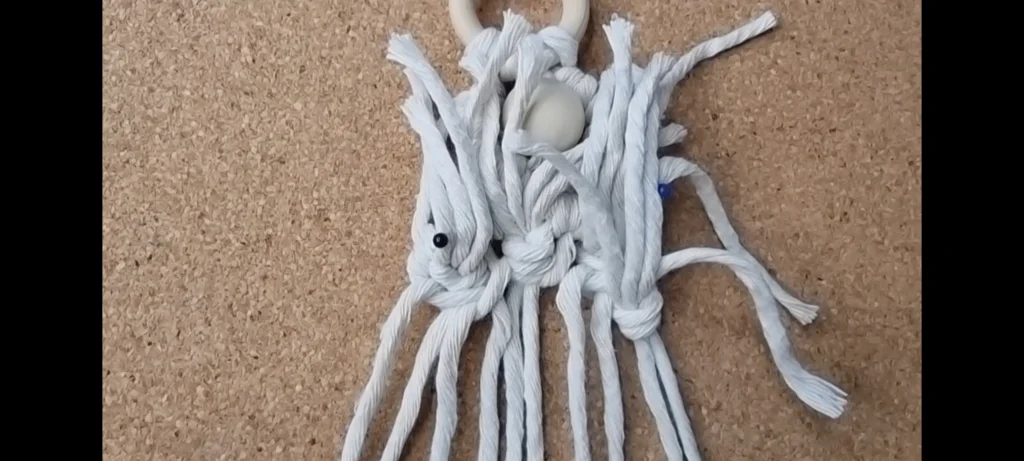
Create a brushed layer
The first layer to create is one you will brush out later. So you just need to create long cords to be able to brush and cut.
You do this by taking two 15cm cords at a time, picking up two cords from the tree and placing the cords in front of the two cords picked up, and then wrapping them under and pulling through on both sides.
You then can pull what will now be 4 cords up and as tight as you can.
Then use the two cords on either side and do the first part of a square knot to tighten it on.
Reapt three more on the top layer, then four more for the next.
Finish this layer with two diagonal half hitch knots. Add two more 180cm strands during this.
Create the curly tapestry type layer
This layer you can get creative with this and use a mix of cord thicknesses and also textures and colors. With the white tree, I used a thinner cord with a natural texture to add some dimension. I think it makes a huge difference to the overall look.
If you are using thinner cords you need to use longer pieces. For the same size, the cords are 120cm at the top and 180cm for the bottom layer. The thinner cords are 300cm long.
The way you create these curls is really simple. You take two cords, or one if you want a fuller look. Add two new cords at the above mentioned sizes. You attach by starting a square knot and doing the first knot and tying tight at the top.
Then 5/6cm down do a square knot, a full don’t this time. Then repeat these square knots all the way down. Then push the knots up to the top, the gap between the knots will push out to create the curl look.
For the last knot add an extra knot and pull super tight. Then repeat for all cords and you have created a full enough look for you.


Repeat both steps again but with extra layers
You want to do the two layers again but this time add an extra layer or two to each one. Sometimes I cut the ones for brushing a little longer, 18cm but a lot of the time I keep them at 15cm.
I think the best way is to see how the tree is looking and filling out and it will guide on how many layers to add.
How big you want your tree and how thick your cord is will play a big part in your tree’s fullness and how many layers you will want to add.
Finish the bottom off neatly
I finish the bottom off with two half hitch knots joining together in the middle.
The difference with this bottom layer is you want to add each cord you have just knotted into you cord you are wrapping around. You can also add in any loose pieces to help tidy up the tree.
You then want to tie both tassels together. Turn the tree over first.
Take a 100cm cord and wrap it around the cord. But first, you want to create a U-shaped hoop with the longer piece sticking up above. Leave enough to grab later and pull up.
the hoop at the bottom of the U will be used to pull the cord through when done wrapping around so make sure there is room.
Wrap really tightly around 5 or 6 times. Then as mentioned with the last cord go through the hoop and stop wrapping. Now tightly pull the top of the hoop cord up until the cord and hoop have pulled up and behind the cords you just wrapped. You can then trim the top.


Brush out and cut
I use a dog brush to first brush out macrame. I then use a comb to finish off.
Once brushed out cut the in a straight line. Take your time and go longer first and then work up. Cutting is easily the hardest part for me. I find it easier when the macrame Christmas tree is hanging.
And that is it, your Christmas tree is ready to hang up and celebrate the holidays.

Macrame Christmas Tree
I know this is the normal step by step with a macrame pattern. I hope you found it useful though. Any questions or if you have some suggestions or tips, I would love to hear them!
Leave them in the comments below, happy crafting!


Leave a Reply